
Deep tile cleaning in bathrooms and kitchens is essential for hygiene, preventing mold, mildew, and bacteria growth, and maintaining an aesthetically pleasing space. It involves understanding floor type, age, and condition, as well as using the right tools and techniques. Preparation includes decluttering, vacuuming, gathering supplies like a tile scrubber, mop, detergent, and protective gear. The process involves a combination of cleaning solutions, scrubbing brushes, and steam cleaning to remove deep-seated dirt and stains. Post-cleaning, sealing products protect tiles from moisture, stains, and dirt. Regular maintenance, including daily sweeping/vacuuming, weekly damp mopping, and annual sealer application, preserves tile floors between deep cleanings, ensuring a vibrant, clean space.
Deep cleaning your kitchen tile floors is essential for maintaining a hygienic and aesthetically pleasing space. This guide delves into the intricacies of deep tile cleaning for bathrooms and kitchens, addressing various aspects from understanding floor types to avoiding common mistakes. Learn how to assess your floor’s condition, gather the right tools, prepare effectively, and restore shine while sealing grout for lasting protection.
Understanding the Importance of Deep Cleaning for Kitchen Tile Floors

Deep cleaning is an essential part of maintaining a hygienic kitchen environment, especially when it comes to tile floors. Kitchen tiles are often subjected to spills, splashes, and regular traffic, making them prone to dirt, grease, and bacteria buildup. Regular mopping may not be enough to remove deep-seated grime, which can lead to unpleasant odours and an uninviting space.
Deep tile cleaning for bathrooms and kitchens goes beyond surface level. It involves scrubbing and rinsing to eliminate embedded dirt and restore the initial glow of the tiles. This process is crucial in preventing the growth of mould, mildew, and bacteria that can cause allergies and respiratory issues. A thorough deep clean ensures not only a visually appealing kitchen but also promotes a healthy living space for all residents.
Assessing Your Kitchen Tile Floor Type and Condition

When it comes to deep cleaning kitchen tile floors, understanding your floor type is crucial. Different tiles, from ceramic to porcelain, have unique characteristics that influence how they’re cleaned effectively. Older kitchens might feature worn-out tiles with accumulated stains and grout lines that demand extra attention. Conversely, newer installations could benefit from routine maintenance to preserve their luster.
For optimal results in deep tile cleaning for bathrooms and kitchens, consider the age, material, and overall condition of your kitchen tile floor. This initial assessment guides the choice of appropriate cleaning solutions and techniques—whether it’s a gentle scrub or a more intensive approach—ensuring your floor not only looks new but also remains protected and durable.
Gathering Essential Tools and Materials for a Thorough Cleaning

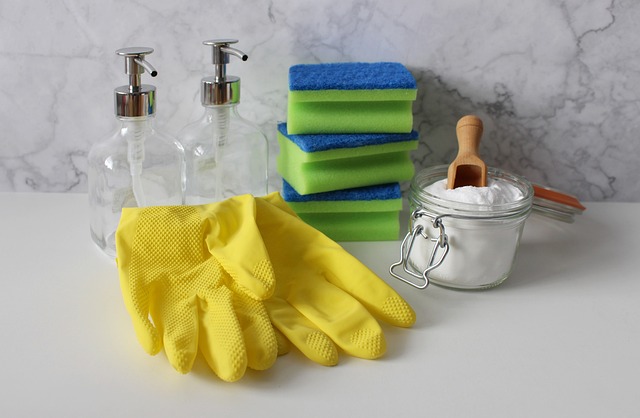
Before diving into the deep tile cleaning process, gathering the right tools and materials is essential for achieving a thorough and sparkling clean in your kitchen or bathroom. Start with a good quality vacuum cleaner designed to handle tiles, ensuring it has a brush attachment to loosen dirt and debris. For heavy-duty stains and grout lines, you’ll need a tile scrubber or brush, preferably one with stiff bristles. Don’t forget the importance of cleaning solutions – opt for a mild, pH-neutral detergent suitable for both tiles and grout. A bucket, sponge, and microfiber cloths are also indispensable. Additionally, protect your hands with gloves to safeguard against harsh chemicals, and consider using a protective mask if you have sensitive respiratory systems or are working in a confined space.
For deep tile cleaning, the right combination of these essential tools and materials will make the task more manageable and effective. The vacuum will swiftly remove loose dirt and dust, while the scrubber or brush will tackle stubborn stains and grout lines. Apply your chosen cleaning solution liberally, allowing it to penetrate and loosen any remaining grime before scrubbing vigorously but gently. Rinse thoroughly with warm water, ensuring all soap residue is removed, and dry with a microfiber cloth or leave to air-dry for a streak-free finish. This meticulous approach will ensure your tiles gleam and your kitchen or bathroom feels refreshed after the deep cleaning process.
Preparing Your Kitchen for an In-Depth Clean

Before diving into the deep cleaning process, preparing your kitchen is a crucial step in achieving optimal results. Start by decluttering the space; remove all dishes, utensils, and appliances from the floor to ensure easy access and avoid obstructions during cleaning. Vacuum or sweep the floor to eliminate loose dirt, crumbs, and other debris. This initial preparation will make the deep tile cleaning process more efficient and effective, especially in areas prone to grease buildup or heavy traffic.
For bathrooms and kitchens that require deep tile cleaning, gathering the right tools is essential. You’ll need a good quality tile scrubber or brush, a powerful vacuum cleaner with a floor attachment, a mop suitable for tiles, and an eco-friendly, non-toxic cleaning solution. Ensure your workspace has adequate ventilation to prevent chemical fumes from accumulating, making the process safer and more comfortable as you tackle these hard-to-reach nooks and crannies.
Removing Deep-Seated Dirt, Stains, and Grout Discoloration

Deep-seated dirt, stains, and grout discoloration can make your kitchen tile floors appear dull and uninviting. To restore their gleam, a thorough deep cleaning is essential for bathrooms and kitchens alike. This involves more than just surface scrubbing; it requires reaching into the pores of the tiles and grout lines to eliminate built-up grime.
A combination of powerful cleaners, scrub brushes, and steam cleaning can effectively target these issues. First, apply an enzyme-based cleaner to break down organic stains. Then, use a stiff brush to agitate the cleaner into the tile and grout, allowing it to dissolve tough debris and grime. After letting the cleaner sit for several minutes, rinse thoroughly with hot water. For stubborn stains or discoloration, repeat the process or consider using a steam cleaner to inject high-pressure steam into the pores, helping to dislodge dirt and brighten the floor’s overall appearance.
Restoring Shine and Seal to Your Tile Floors
After a thorough deep cleaning, it’s time to restore the shine and seal of your kitchen tile floors. This step is crucial for both aesthetic appeal and protective purposes in high-traffic areas like bathrooms and kitchens. Begin by applying a high-quality tile floor cleaner designed to cut through dirt and grime while preserving the grout lines. Follow the manufacturer’s instructions for application and let the cleaner sit for a few minutes to allow maximum absorption.
Once the cleaner is active, use a microfiber mop or sponge to buff the floors and remove any remaining residue. Next, apply a sealer specifically formulated for tile floors. This will create a protective barrier against moisture, stains, and dirt, ensuring your floors stay looking fresh and clean longer. Be sure to follow the sealer’s application instructions for optimal results in deep tile cleaning for bathrooms and kitchens.
Maintenance Tips for Longevity and Future Deep Cleans

Regular maintenance is key to preserving the appearance and longevity of your kitchen tile floors between deep cleaning sessions. Start by sweeping or vacuuming daily to remove loose dirt, debris, and spills. This prevents particles from setting into the grout lines and stains forming. Additionally, use a damp mop once a week with warm water and a mild detergent suitable for tile floors. Avoid harsh chemicals that could damage the tiles or leave behind residue.
For added protection, apply a non-toxic sealer annually to create a protective barrier against moisture, stains, and bacteria. This is especially important in high-traffic areas like kitchens. Between deep cleans, spot clean immediately when something spills; the faster you address it, the less chance there is of permanent staining. Regular maintenance combined with prompt spot cleaning will ensure your kitchen tile floors remain vibrant and free from excessive buildup for longer, making future deep tile cleaning sessions easier and more efficient.
Common Mistakes to Avoid During the Deep Cleaning Process
When deep cleaning kitchen tile floors, it’s essential to avoid common mistakes that can lead to inadequate results or even damage. One frequent blunder is using aggressive cleaning chemicals without proper ventilation, which can cause respiratory issues and leave harsh residues on the tiles and grout. Always opt for gentle, non-toxic cleaners designed for deep tile cleaning in bathrooms and kitchens.
Another mistake to steer clear of is over-scrubbing or using a stiff brush, especially on delicate tile surfaces. This can scratch or abrade the tile finish. Stick to a soft-bristled brush or a microfiber mop for efficient yet gentle cleaning. Additionally, forgetting to rinse thoroughly after applying cleaners can leave behind harsh chemicals, impacting both air quality and the longevity of your tile floors. Rinse multiple times with clean water to ensure no residue is left behind.